
Planning a Personalized Wedding Gift Box
Plan a personalized wedding gift box by choosing the recipient first—the couple together or one partner—then use that choice to guide one coherent theme, suitable contents, meaningful personalization, box fit, and presentation. Prioritise recipient relevance and practical suitability over decoration, and finish by checking text accuracy, normal closure, stability, visibility, and overall coherence.
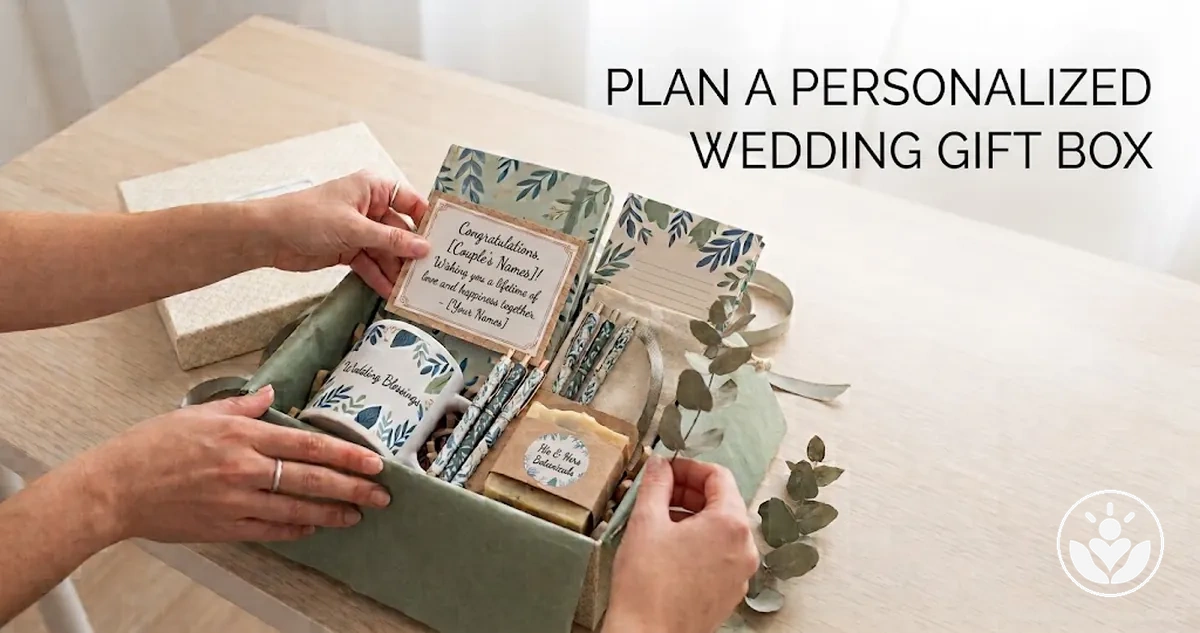
Wedding gift box planning path
Use the recipient as the starting condition, then carry the same relevance through each decision. The five stages below mirror the article’s planning order.
- Choose the recipient scope
For a couple, favour shared relevance and credible joint use or meaning. For one partner, known individual preferences and relationship-specific references can carry more weight.
- Set one theme and test the contents
Let a real recipient cue or shared interest lead the theme. Include contents only when they also suit practical needs, preferences, and the intended recipient.
- Personalize with verified details
Use accurate names, the confirmed wedding date, a suitable message, or a meaningful shared reference. Personalization should add specificity rather than repeat decoration.
- Fit and assemble the box
Choose the box from the actual contents and internal space required. Arrange major items first, add finishing details last, and make sure the box closes normally.
- Run the final check
Verify text, recipient fit, theme consistency, visibility, movement, stability, and closure. Correct only the failed condition before gifting.
Here, a personalized wedding gift box means a curated gift assembled for a couple or for one partner—not a reception card box, guest-favour box, or wedding-planning box. The recipient decision sets the context for every later choice.
Table of Contents
Decide Who the Wedding Gift Box Is For
Decide whether the wedding gift box is for the couple together or for one partner, because recipient scope changes what counts as relevant.
A couple-focused box favours shared use and mutual relevance, while the tone and personalization need to suit both people.
A box for one partner allows individual preferences and personal references to carry more weight.
The choice should reflect your relationship with the recipient, what you know about their preferences, the value of shared use, and any practical constraints.
These criteria determine whether the box should serve shared relevance or focus more closely on one person's interests and experiences.
The comparison image shows how shared-recipient and individual-recipient planning cues can differ without implying that either recipient scope is preferable.
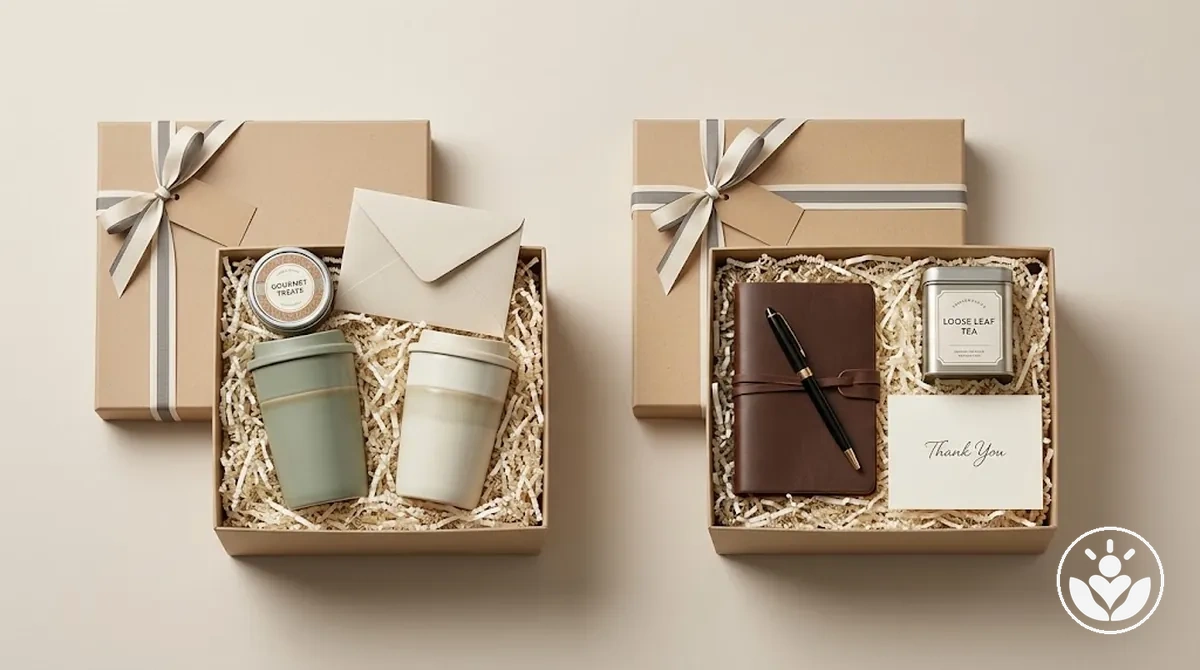
- Recipient scope: For the couple, favour details that have mutual relevance; for one partner, individual relevance can take priority.
- Relationship: A close relationship can support personal references, while limited recipient knowledge favours less intimate details.
- Shared use: For a couple, consider whether an item or detail has joint use or meaning for both recipients.
- Personal relevance: For one partner, known preferences, memories, or individual interests can support more specific personalization.
- Practical constraints: Known preferences and other practical limits can rule out choices that would otherwise suit the intended recipient.
Once the recipient scope is clear, you can plan the gift box around that shared or individual relevance.
Plan a Shared Gift Box for the Couple
A shared wedding gift box for the couple needs items or details with credible relevance to both people.
That mutual relevance can come from shared interests, joint routines, shared use, memories, or a personal message connected to their relationship.
The couple does not need identical preferences for the box to feel genuinely shared.
The image demonstrates how a coordinated box can express shared use or shared meaning without prescribing a fixed set of items or one theme.
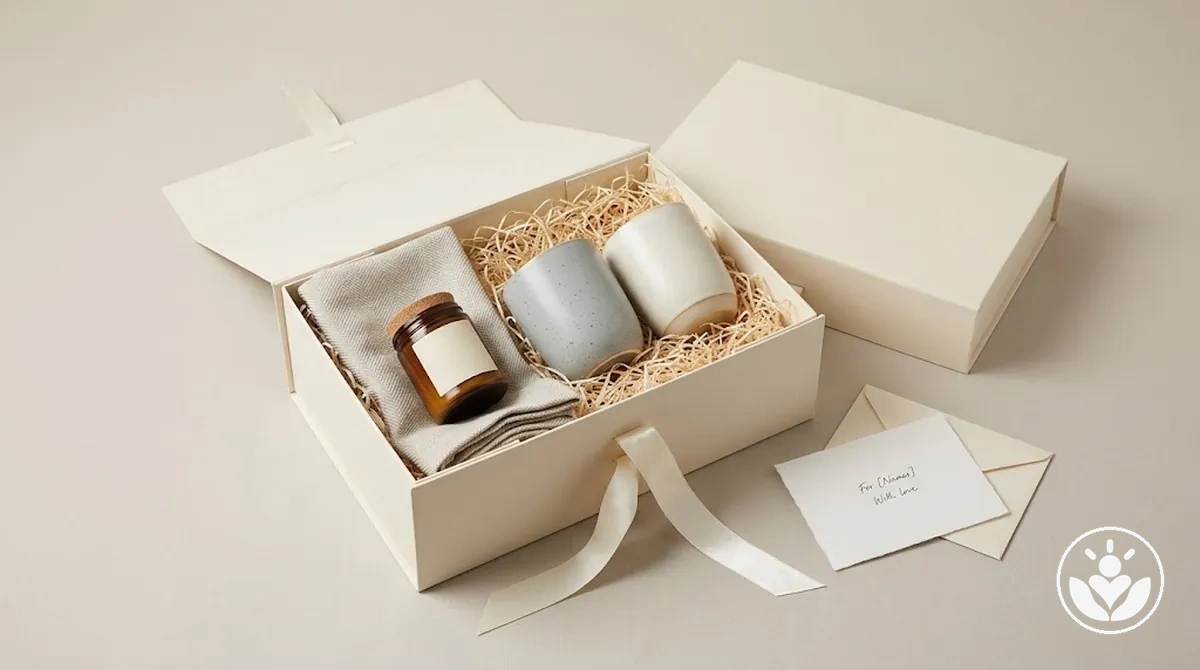
Use these criteria to test whether each inclusion contributes to mutual relevance rather than functioning as an unrelated individual gift.
- Shared interests: An item category linked to an activity or interest the couple genuinely shares can relate to both recipients without assuming identical tastes.
- Joint routines: Something connected to a routine they do together can support practical shared use or reinforce a familiar part of their life as a couple.
- Home or celebration relevance: An inclusion can work for both when its function relates to a shared home activity, celebration, or experience.
- Shared meaning: A keepsake, personalization detail, or personal message can reflect a memory or reference that is meaningful to the couple together.
- Balance: Judge the complete box by whether both recipients have credible points of relevance; balance matters more than making every item identical or jointly used.
Adapt the Box When It Is for One Partner Rather Than the Couple
A wedding gift box for one partner allows more emphasis on individual preferences and private personal references than a shared couple box.
Personal relevance can come from a known preference, a shared memory with the giver, or another detail that reflects the individual recipient.
The depth of that personalization depends on the relationship, message tone, timing, and what the giver genuinely knows about the recipient.
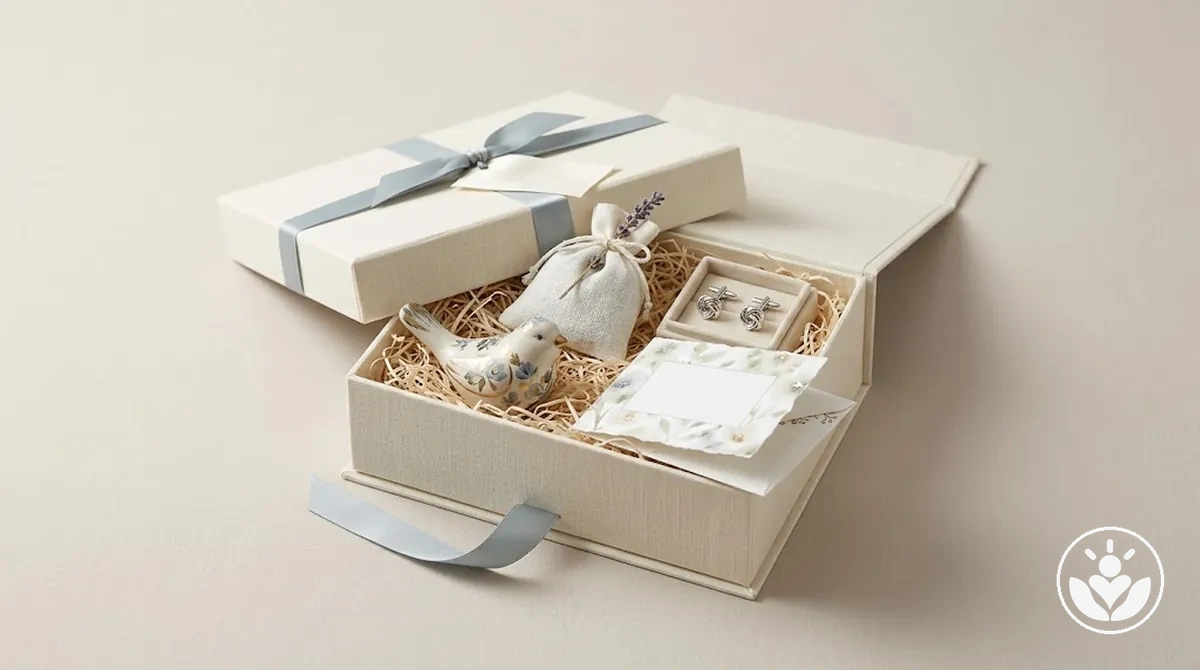
The image demonstrates how individual specificity can appear through personalized details, a keepsake cue, and a personal note without prescribing a particular item list.
When the recipient narrows to one partner, the criteria below identify what can become more individual while remaining appropriate to the wedding occasion and the giver-recipient relationship.
- Individual preferences: Known interests or preferences can guide personalization and item choices when the giver has enough knowledge to make the connection credible.
- Shared memory: A memory or personal reference shared by the giver and recipient can support a keepsake or personalization detail with specific personal relevance.
- Message tone: The wording can become more personal when the relationship and timing support that level of familiarity.
- Individual-use items: Items intended mainly for the individual recipient can fit when their relevance comes from that person's known needs or interests rather than gender-based assumptions.
Build the Box Around a Cohesive Wedding Theme
Build the wedding gift box around one theme that draws from recipient cues or couple interests and can guide the contents, personalization, and presentation.
A useful theme gives several choices a common direction instead of acting as a decorative label.
For example, a shared interest can shape the type of contents, inspire a related personalized detail, and influence how the box is presented.
The image demonstrates how one theme can connect several gift-box decisions without prescribing a universal wedding aesthetic.
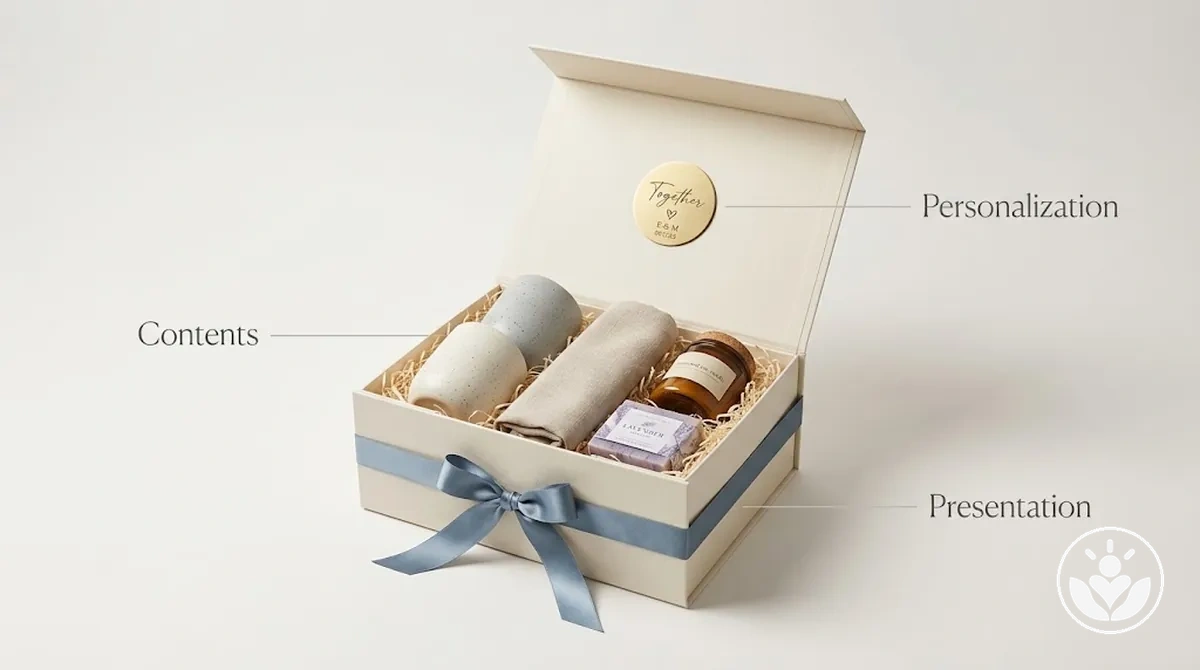
Use these planning criteria to test whether the theme can consistently guide the contents, personalization, and presentation:
- Personal relevance: The theme should draw from a known recipient cue rather than relying only on a decorative colour, season, or visual style.
- Shared relevance: For a couple-focused box, couple interests or shared references can provide a meaningful theme direction when they genuinely relate to both recipients.
- Compatibility: The contents, personalization, and presentation should be able to relate to the same theme without forcing unrelated choices into it.
- Flexibility: The theme should allow different item categories and presentation details to work together without requiring every element to look identical.
- Restraint: Wedding-style cues should refine the theme rather than determine its meaning when there is no clear connection to the recipients.
Once this planning principle is clear, you can choose a suitable wedding theme in more detail.
A theme is useful only when it improves coherence across several choices.
Match the Theme to the Couple's Interests and Wedding Style
Strong theme fit starts with real couple interests and personal relevance, while wedding style acts as a secondary compatibility cue.
A shared interest can support a more explicit theme when it has clear shared relevance to both recipients.
A wedding aesthetic can then influence visual details without being treated as evidence of the couple's preferences.
The image compares recipient-led thematic fit with decorative-only matching, using the same gift-box format to show the distinction without ranking either aesthetic.
When evidence of the couple's interests is limited, a subtler theme is more appropriate than building the box around an assumed preference.
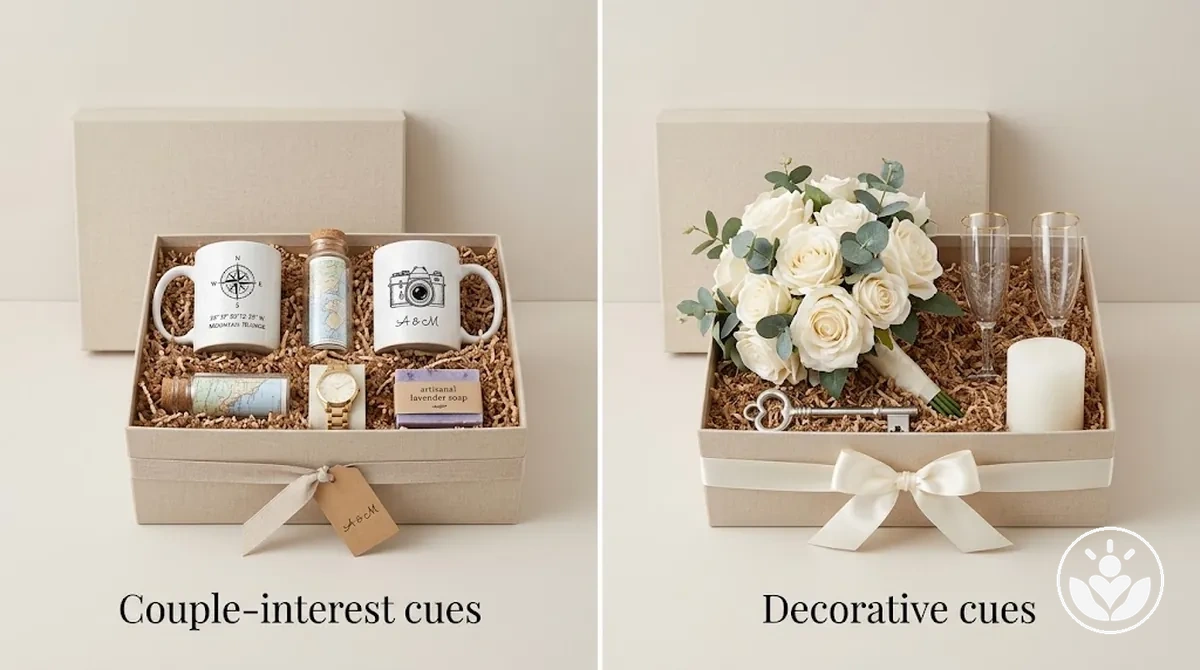
Use these criteria to separate meaningful theme alignment from surface-level wedding styling and decide how specific the theme should be:
- Personal relevance: If a theme connects to a known preference or meaningful reference, it has stronger personal relevance; without that evidence, keep the connection more restrained.
- Shared relevance: If a couple interest genuinely applies to both recipients, it can support a clearer shared theme; if it mainly reflects one person, avoid treating it as a couple-wide preference.
- Wedding-style compatibility: A palette, venue aesthetic, or other wedding-style cue can support visual alignment, but decorative similarity alone does not establish personal fit.
- Content flexibility: A workable theme should accommodate suitable contents without forcing unrelated items into the same decorative treatment.
- Over-theming: If maintaining the theme requires assumed preferences, excessive motifs, or unsuitable contents, reduce the thematic specificity and retain only the cues supported by what is known about the couple.
Decorative matching alone is not enough evidence that a theme fits the couple.
Choose Contents That Fit the Theme and Intended Recipient
Wedding gift box contents should support both the chosen theme and the intended recipient rather than fill the box arbitrarily.
Recipient fit determines whether an inclusion is relevant to the person or couple, while theme fit helps the different contents feel connected.
The image demonstrates this balance by organizing different content functions within one coherent gift box rather than presenting individual products as recommendations.
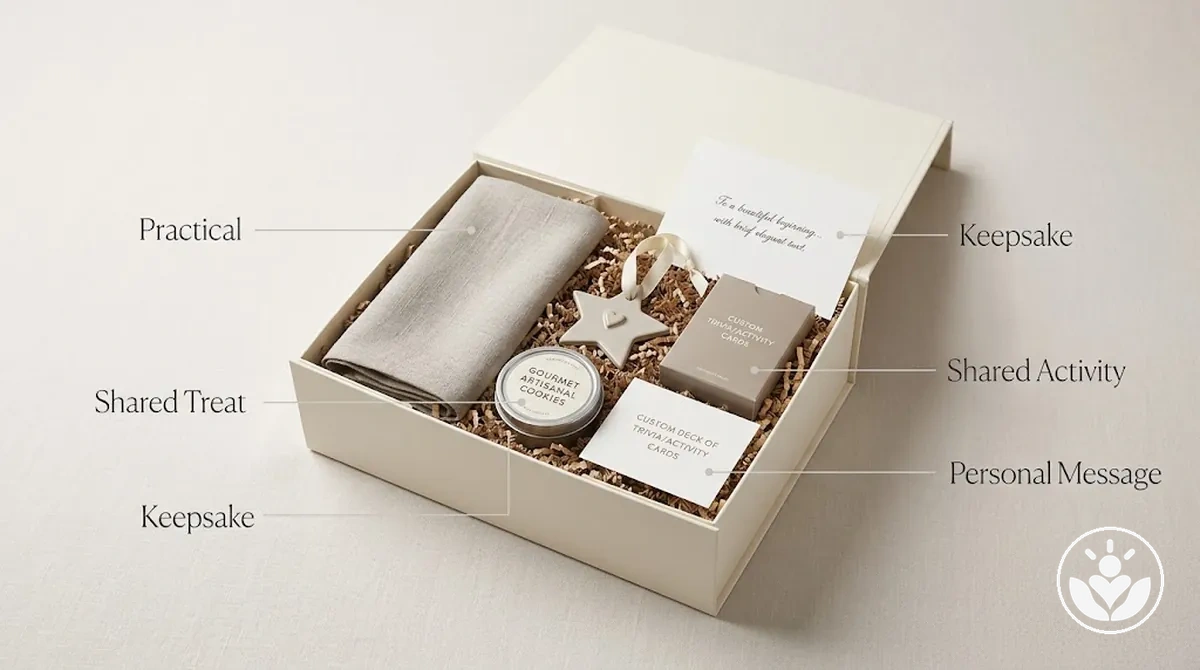
Practical suitability can override theme fit when an otherwise attractive inclusion conflicts with dietary needs, lifestyle constraints, known preferences, or how the recipient would actually use it.
Shared treats therefore need to suit relevant dietary needs, while practical items and shared-activity elements need a credible use for the intended recipient.
Keepsakes and a personal message should also have a meaningful recipient connection rather than relying on sentiment alone.
The groups below organize contents by function rather than by product and show how each inclusion can be tested for recipient fit, theme fit, and its practical or emotional role:
- Shared treats: Include them when they suit known preferences and dietary needs while supporting the theme; if those conditions are uncertain or conflict with the recipient's needs, another content function is more suitable.
- Practical items: Choose an item when its likely use fits the recipient or couple and its presentation can support the theme; an attractive item that has little practical relevance lacks recipient fit.
- Shared activity: An activity-related inclusion fits when it connects to something the couple genuinely does or can use together; without that shared relevance, it can make the box feel less balanced.
- Keepsakes: A keepsake supports sentiment when it connects to a known memory, relationship, or shared reference and still fits the theme; a generic decorative object may look suitable without carrying the same personal relevance.
- Personal message: A message can connect the contents to the recipient and explain a shared reference or sentiment, helping practical and sentimental elements feel part of the same gift rather than unrelated additions.
A balanced set of contents combines usefulness, sentiment, and thematic coherence without forcing an inclusion that conflicts with recipient needs.
For a broader inventory beyond this selection method, see personalized gift box ideas.
Personalize the Wedding Gift Box With Meaningful Details
Wedding gift box personalization should encode something true about the recipient or wedding occasion rather than simply repeat decorative text.
Accurate names, a wedding date, a relevant message, or a shared reference can add specificity when each detail has clear recipient relevance.
A colour choice or customized detail can reinforce the same meaning when its placement supports the box rather than competing for attention.
Meaningful personalization vs repetitive decoration
Meaningful personalization
Select a small number of personal details and give each one a purpose. A name might identify one keepsake, a shared reference can inform another detail, and the message can carry the personal sentiment.
Repetitive decoration
Repeating the same name, date, or motif across many items does not add new meaning. Use restraint when repetition would dominate the presentation.
The following channels organize where recipient-specific meaning can be expressed without requiring every surface or item to be customized:
- Names: Use an accurate name where identifying the recipient or couple gives the detail a clear purpose, rather than repeating it across unrelated items.
- Wedding date: Place the date on a detail connected to the occasion when that reference supports its meaning and fits naturally within the presentation.
- Personal message: Use the message to express a relationship-specific thought or occasion sentiment instead of relying on a generic wedding slogan.
- Shared reference: Reflect a known memory, interest, place, or other shared reference through one relevant customized detail when the connection is meaningful to the recipient.
- Colour choice: Use a recipient-relevant or occasion-compatible colour consistently in selected details so it reinforces the presentation without becoming repetitive decoration.
Use Names, the Wedding Date, and a Short Message
Use names, the wedding date, and a short message only when the information is confirmed and the wording fits the relationship and intended tone.
Use the checks below to separate accuracy, naming, tone, and placement before any text is finalized.
- Name spelling: Use the confirmed spelling of each name; an incorrect spelling undermines the personal detail regardless of where it is placed.
- Wedding date: Use the confirmed date and keep the date format consistent so each reference to the occasion remains clear.
- Recipient naming: Use a title, surname, or other form of recipient naming only when it is known to be appropriate; otherwise, avoid assumptions about naming conventions.
- Message tone: Match the wording to the relationship and intended tone so the message fits the recipient without relying on a formulaic wedding phrase.
- Placement and accuracy: Put each text element where it has a clear purpose, limit unnecessary repetition, and verify the names, wedding date, wording, and placement before the text is finalized.
Coordinate Colours and Decorative Details With the Chosen Theme
Colours and decorative details should reinforce the chosen theme rather than introduce a second visual direction.
Use the attributes below to keep the palette, materials, texture, wrapping, and small accents in the same visual direction.
- Colour palette: Choose colours that coordinate with the established theme; limiting unrelated colours helps the contents and decorative details read as part of the same visual direction.
- Materials: Select materials that support the same theme, so the box, inserts, and decorative elements have a consistent material direction rather than competing finishes.
- Texture: Use texture as a supporting cue, such as smooth, matte, natural, or soft finishes, when it complements the theme rather than becoming a separate decorative focus.
- Ribbon and wrapping: Coordinate ribbon and wrapping with the palette and materials so these accents frame the contents without competing with them.
- Motifs and small accents: Use a restrained motif or repeated accent when it has a clear connection to the theme and intended recipient; unrelated motifs can weaken cohesion by introducing competing visual cues.
Assemble the Final Gift Box for a Cohesive Presentation
Begin final wedding gift box assembly only after the final contents and personalization choices are settled.
Follow the sequence from box fit and preparation to placement, finishing details, closure, and a final check.
Locking the final contents before placement and finishing reduces rework during assembly.
- Confirm the final contents and box fit. Gather every planned item and check that the final contents fit within the box without forcing the lid, sides, or other items out of position. If the box fit does not work, resolve it before placement begins.
- Prepare the box. Open and prepare the box for assembly, checking that the interior is ready for the planned contents and that nothing obstructs their intended placement.
- Place the focal item. Position the focal item first so its size and shape establish the main arrangement. Check that it fits without blocking the intended position of the supporting items.
- Arrange the supporting items. Place supporting items around the focal item according to their size and intended visibility. Check that they can remain in workable positions before adding smaller details.
- Add personalization and finishing details. Place the planned personalization and finishing details after the main contents are arranged so they support the presentation without obscuring important items or interfering with closure.
- Close and check the assembled box. Close the box without forcing it, then check the closure and physical stability of the contents. If an item shifts enough to disrupt the arrangement or prevents normal closure, adjust its placement before finalizing the box.
Match the Box Size to the Final Contents
- Internal dimensions: Compare the internal length and width with the dimensions and planned arrangement of the final contents; the items need enough internal space to sit in their intended positions without being forced together.
- Usable depth and tallest item: Compare the usable depth with the tallest item in its intended position; insufficient depth can prevent normal closure or place pressure on the item.
- Item volume: Consider the combined item volume in the planned arrangement, not only whether each item fits separately; the set needs enough space to remain workable without excessive compression or unused gaps.
- Weight distribution: Check how heavier and lighter items occupy the available space; the arrangement should allow the contents to remain reasonably balanced rather than concentrating weight where it disrupts the intended fit.
- Closure clearance: Allow enough clearance above and around the arranged items for the box to close normally without pressing the lid against the contents.
- Support space: Leave modest internal space where protective or presentation material is needed to support the contents, while avoiding unnecessary empty space that weakens the intended arrangement.
The final fit test is physical: arrange the complete item set with its required support space, close the box normally, and check that the contents are not excessively compressed and the closure is not obstructed.
Arrange Items and Finishing Details Without Overcrowding the Box
Build the arrangement in an order that protects visibility, spacing, stability, and closure, then add finishing details only after the main placement works.
Position the focal item and taller items first so smaller supporting items can support rather than obscure them.
Judge each placement by the item's height, weight, shape, and the available box space.
- Place the focal item first. Position the focal item where it remains easy to see and leaves enough room for the rest of the arrangement. Check that its height and shape do not interfere with closure.
- Position taller items. Place taller items where they remain visible without blocking the focal item or creating an unstable layout. Reposition them if their height crowds neighbouring contents or limits usable spacing.
- Add supporting items. Arrange smaller supporting items around the major pieces so they reinforce the layout without covering important details. Check that their weight and position do not make the arrangement unstable.
- Keep useful spacing. Leave enough space between items for the arrangement to remain readable and workable. If removing or repositioning one item improves visibility or closure, use the less crowded arrangement.
- Add finishing details last. Place the planned finishing details only after the main arrangement is stable, using them to support the chosen theme without filling every gap. Check that they do not obscure items or interfere with closure.
- Check for overcrowding. Close the box normally and review the arrangement for compressed items, blocked visibility, poor spacing, or unstable placement. If any of these appear, reduce or reposition contents before finalizing the box.
Once the local arrangement works for visibility, spacing, stability, and closure, you can create a polished presentation without reopening the placement decisions.
Check the Finished Wedding Gift Box Before Giving It
Use a final check to confirm the finished wedding gift box is accurate, appropriate for the recipient, consistent with the chosen theme, physically stable, able to close normally, and coherent in presentation before gifting.
The verification should separate personal accuracy and recipient fit from physical and visual checks.
If a condition fails, make the relevant correction before the box is considered ready to give.
- Check personal accuracy: Confirm that names, the wedding date, and the message contain the intended information. If any text is incorrect, correct it before gifting.
- Confirm recipient fit: Review the contents and personalized details against what is actually known about the recipient or couple. If an element relies on an unsupported preference or inappropriate reference, revise or remove that element.
- Verify theme consistency: Check that the contents, personalization, colours, and decorative details remain compatible with the chosen theme. If an element introduces an unrelated visual or thematic direction, simplify or adjust it.
- Check item stability: Handle the closed box carefully and note whether the contents remain in a workable arrangement. If obvious movement disrupts the placement, correct the arrangement before gifting.
- Confirm closure: Close the box normally and check that the lid or other closure is not forced by the contents or finishing details. If closure is obstructed, reposition or reduce the element causing the interference.
- Review presentation: Check that important items and personalized details remain visible when the box is opened and that the presentation supports the recipient and chosen theme. If crowding or decoration obscures them, reposition or remove the competing detail.
- Confirm the ready-to-give condition: The box is ready to give when the final check finds no unresolved accuracy, recipient-fit, theme-consistency, stability, closure, or presentation issue that requires correction.
Verify Names, Dates, and Message Accuracy
Verify every personalized text detail against a confirmed source before the wedding gift box is finalized.
Check the name spelling, wedding date, date format, message wording, punctuation, and recipient naming rather than relying on memory when confirmation is available.
This separate accuracy pass helps catch text that may be difficult to correct after printing, engraving, or final assembly.
- Name spelling: Compare each name with the confirmed source and correct any mismatch in spelling, spacing, or recipient naming before finalization.
- Wedding date: Verify the wedding date against the confirmed source and correct any incorrect day, month, or year.
- Date format: Check that the chosen date format is consistent wherever the wedding date appears and correct any conflicting version.
- Message wording: Compare the message wording with the intended confirmed text, including the recipient-appropriate tone, and correct any unintended change.
- Punctuation: Check punctuation, capitalization, and spacing in each inscription or message and correct errors that alter clarity or consistency.
- Repeated text: Compare every repeated instance of names, the wedding date, or message text across the box and correct any version that does not match the confirmed source, so every repeated instance matches before finalization.
Check That the Contents Suit the Recipient and the Presentation Holds Together
The finished wedding gift box should still fit the recipient while remaining coherent, secure, visible, and closable as one gift.
The final pass should separate recipient relevance and shared suitability from physical and visual checks such as movement, closure, and theme consistency.
Make only the correction needed for a failed condition rather than restarting the planning process.
- Recipient relevance: Confirm that the final contents still suit what is known about the recipient; if an item conflicts with a confirmed preference or need, remove or replace only that item.
- Shared suitability: If the gift is for a couple, check that the contents have credible shared suitability rather than serving only one person without a clear reason; revise the mismatched element if needed.
- Dietary needs and lifestyle constraints: Check known dietary needs or lifestyle constraints against relevant contents; if a confirmed conflict exists, correct that specific inclusion before gifting.
- Theme consistency: Verify that the contents, personalization, and decorative details still support the selected theme; simplify or adjust an element that introduces an unrelated direction.
- Item visibility: Open the box and check that important items remain visible rather than being hidden by supporting pieces or decorative details; reposition the obstructing element if needed.
- Movement and stability: Handle the closed box carefully and check whether noticeable movement disrupts the arrangement; reposition the affected contents if the layout does not remain workable.
- Closure: Confirm that the box closes normally without pressure from the contents or decorative details; adjust the interfering element if the closure is obstructed.
- Decorative interference: Check that decorative details support the presentation without covering, compressing, or competing with the contents; remove or reduce only the detail causing the problem.
The box is ready when any required correction is limited to the failed check and no genuine recipient-fit or physical presentation problem remains.