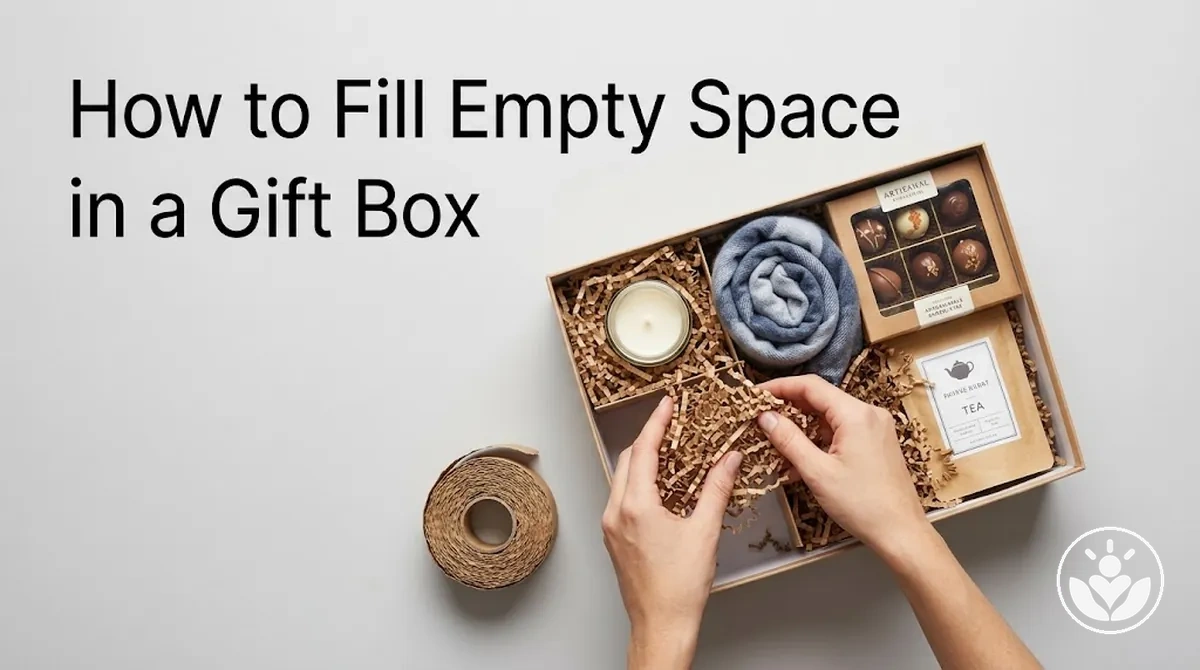
To fill empty space in a gift box, first identify whether the unused space is widespread, mainly vertical, or localised. Raise low items with base support, reposition clustered contents, and add filler only to the remaining local gaps; if broad space still dominates after those adjustments, use a better-fitting box. Stop when the contents remain visible and uncrowded and the lid closes normally without pressure.
Choose the fix from the gap pattern
Use the visible distribution of empty space to choose the first correction. These patterns indicate a likely direction; they do not prove a single cause by themselves.
Space is widespread around the contents
Check
Box footprint versus the combined content footprint.
First correction
Reposition the contents and confirm whether the broad gap remains.
If it persists
Use a better-fitting box rather than filling most of the excess capacity.
Contents sit low with space mainly above them
Check
Item height relative to box depth.
First correction
Raise the base gradually beneath low-profile items.
Stop when
Items are stable, visible and still have enough clearance for normal lid closure.
Only one or a few localised gaps remain
Check
Whether clustering or uneven placement creates the gap.
First correction
Reposition the contents to redistribute the empty area.
Then
Add targeted filler only to the residual gaps that still look unintentionally sparse.
The box looks filled but items still move
Interpretation
This is primarily a stabilisation problem, not a visual empty-space problem.
Correction
Stabilise the items instead of continuing to add decorative filler.
Why
More visible volume can change appearance without reliably controlling movement.
Table of Contents⌄
Diagnosing Excess Empty Space in a Gift Box
Diagnose excess empty space in a gift box by checking where the unused space appears before changing the box or adding filler.
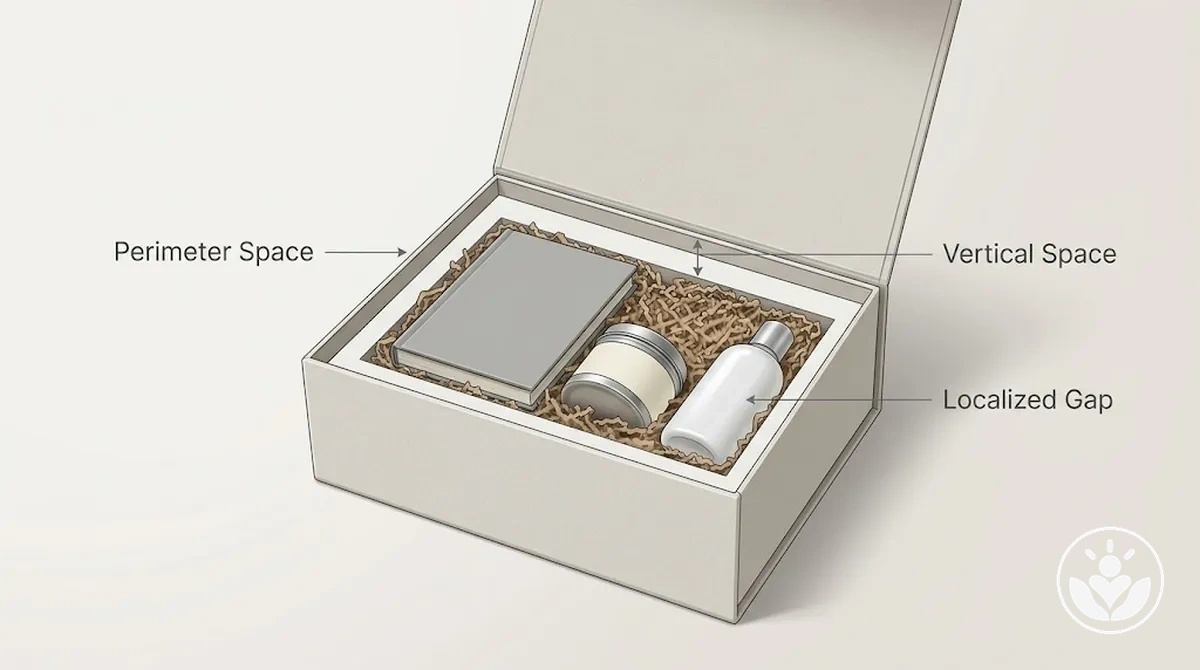
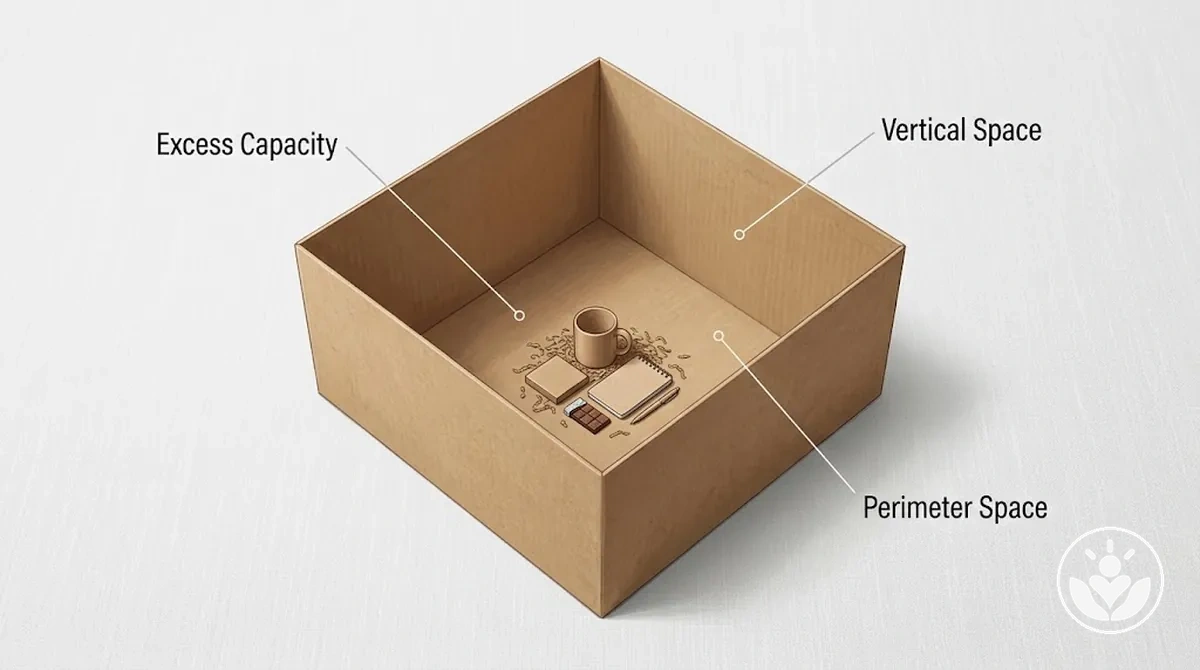
The gap distribution may be widespread around the perimeter, concentrated vertically because item height is low relative to box depth, or limited to localised gaps; these signals support a provisional interpretation rather than a certain cause.
Widespread perimeter space can indicate that the contents occupy relatively little of the available footprint, while pronounced vertical space suggests checking item height against the box depth.
Localised gaps can instead point toward placement, especially when most of the remaining space is occupied.
Repositioning provides a useful check because a gap that moves or closes with the contents supports a placement-based interpretation.
If widespread perimeter or vertical empty space remains after repositioning, the signal is more consistent with an overall fit or height mismatch than with one isolated placement issue.
No single signal identifies the cause by itself, because similar sparse-looking gift boxes can result from different combinations of fit, height, and placement.
The next diagnostic distinction is whether the remaining empty space is widespread or vertical across the box, or localised around specific contents.
How to Judge Whether a Gift Box Has Too Much Empty Space
There is no universal correct percentage of empty space for a gift box.
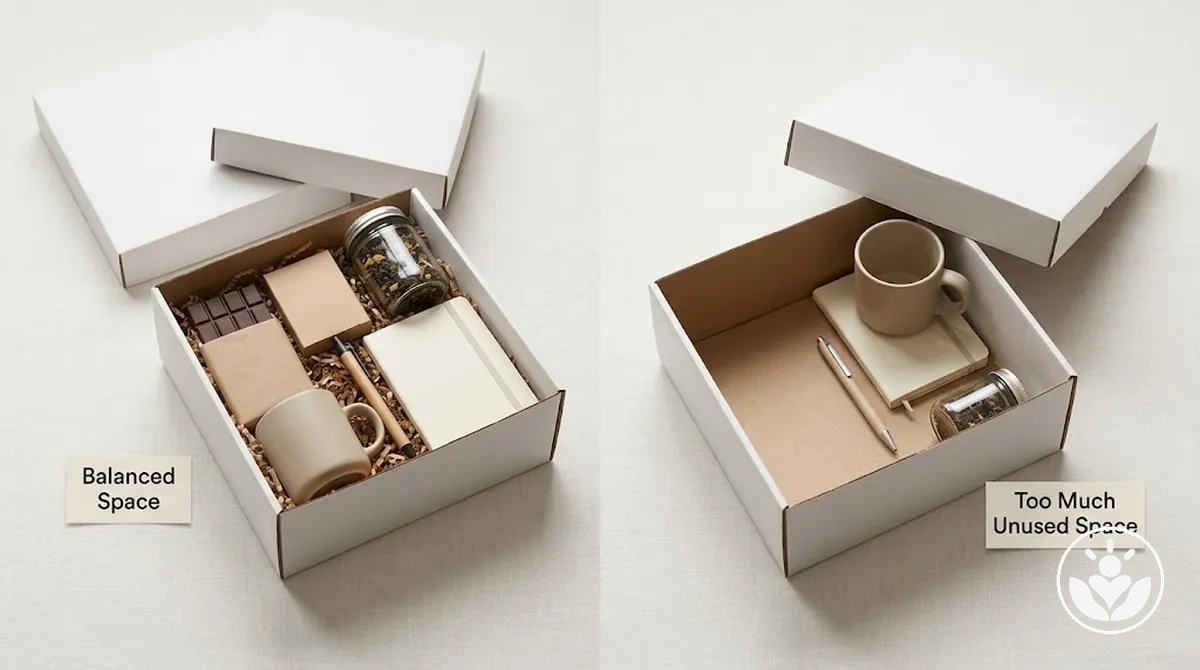
Judge the amount by how well the contents fit and remain visible, how the gap distribution affects visual balance, whether there is room for filler without crowding, and whether normal lid closure is possible without compression.
These criteria work together to distinguish useful breathing room from excessive visible unused space rather than applying a fixed numeric threshold.
Visible unused space: Some empty space can support clear presentation, but unused areas that visually dominate the contents may indicate that the gift box is too spacious for the current presentation.
Item height: Contents that sit at a visually appropriate height relative to the box depth can support a balanced fit, while items that appear noticeably low may make the empty space more prominent.
Gap distribution: Gaps distributed around the contents can preserve visual balance, while large or uneven voids may make the arrangement appear sparse or undersized.
Filler capacity: Available room for modest filler can support the contents without obscuring them, while filling the space to the point of crowding reduces visibility and practical fit.
Lid closure: The lid should close normally without compressing the contents or filler; compression indicates that the available interior space has been overfilled rather than balanced.
Intentional breathing room can be acceptable when the contents remain visually coherent and the gift box functions normally.
Empty space is more likely to be excessive when dominant or uneven voids make the contents appear undersized or disrupt the overall presentation.
Signs a Gift Box Looks Too Sparse
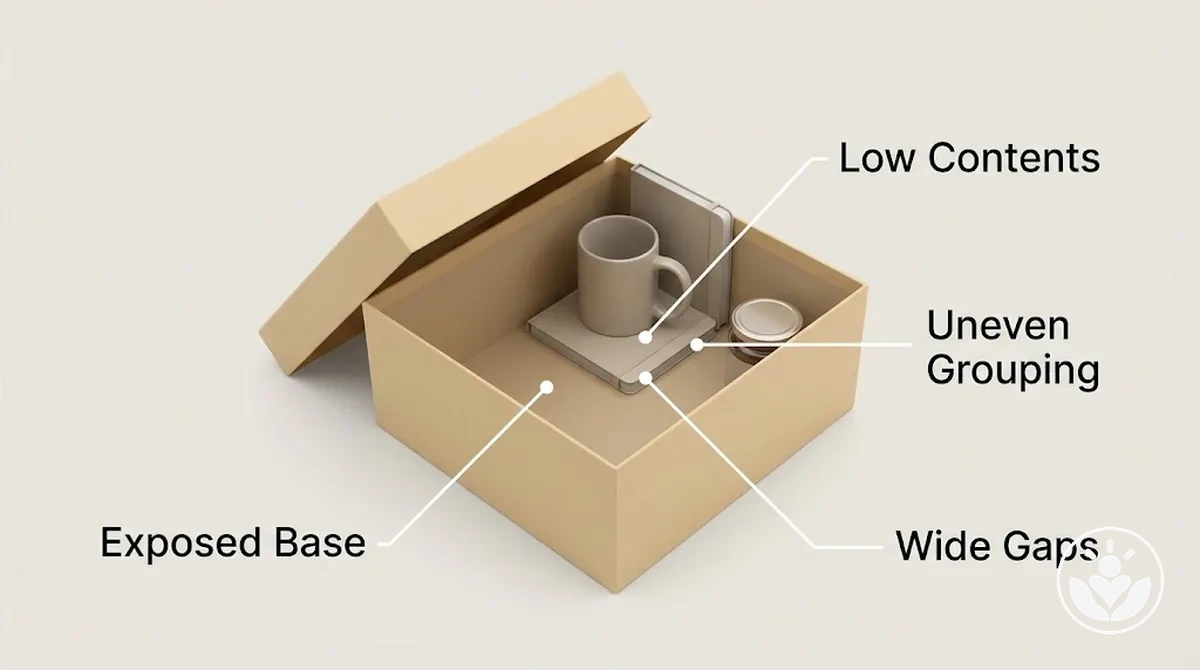
A sparse-looking gift box may show large areas of exposed box base, low contents, uneven visual weight, or wide uneven gaps between items.
These are appearance signals rather than proof of a particular cause, and intentional breathing room should be distinguished from empty space that visually dominates the contents.
Exposed box base: A large visible area of the box floor can make the contents appear sparse when the unused area attracts more attention than the items.
Low contents: Items sitting noticeably low relative to the box walls can create an underfilled appearance when the vertical space remains visually prominent.
Uneven visual weight: Contents clustered mainly on one side can suggest an imbalanced appearance even when other areas of the gift box contain intentional breathing room.
Uneven gaps: One or more wide gaps between items can create visible voids and may signal that the spacing contributes to the sparse appearance.
These visible signals support recognition of a sparse appearance, but their interpretation does not establish why the empty space is present.
Determining the possible cause requires separate analysis.
Why a Gift Box Looks Empty
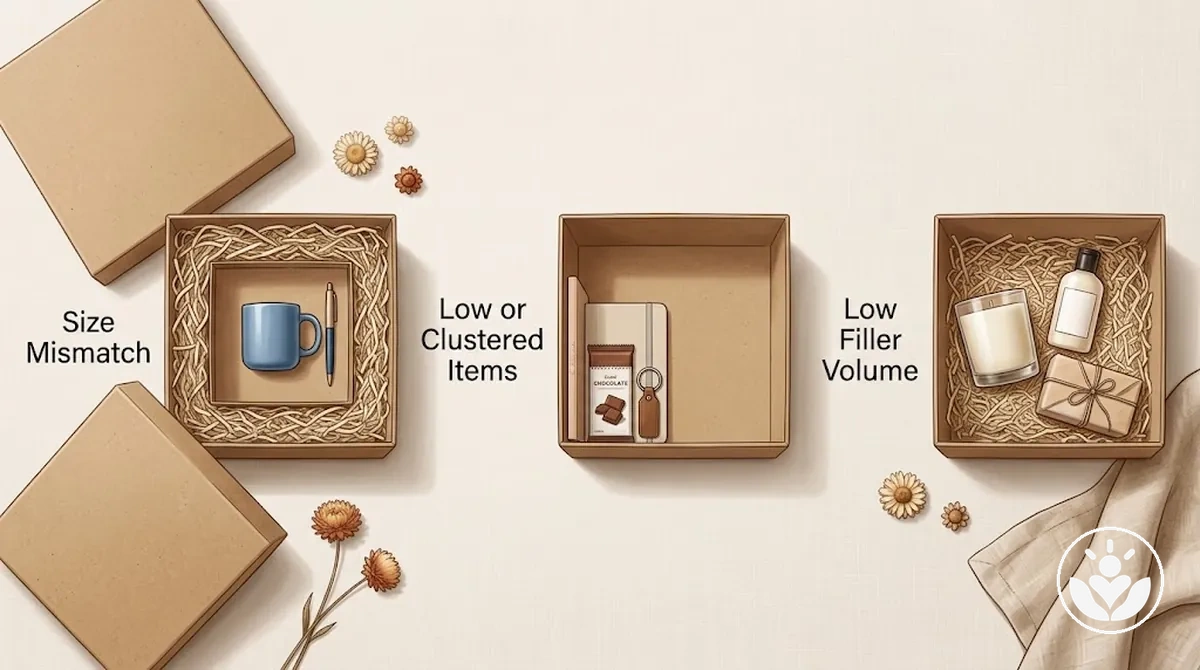
A filled gift box can still look empty because unused space can originate from a fit mismatch, the height or placement of the contents, or insufficient filler volume rather than from too little filler alone.
These cause classes create different spacing patterns, so the source of the unused volume matters when interpreting the empty-looking result.
A mismatch between the box dimensions and the content footprint leaves more perimeter space when the items occupy relatively little of the available base area.
Box depth also matters: when item height is low relative to the available depth, more vertical space remains visible above the contents.
These fit and height relationships can therefore contribute to an empty-looking presentation even when the box contains several items.
Item distribution can also contribute when contents are clustered in one area, leaving unused space concentrated elsewhere and shifting the visual weight of the arrangement.
Filler volume affects how much visible space remains around and beneath the contents, but a filler volume shortfall is only one possible cause; adding filler does not resolve an underlying mismatch in box dimensions, content footprint, item height, or distribution.
These are cause classes behind the visible empty-space patterns, rather than the appearance signals themselves.
The Box Is Too Large for the Contents
An oversized box tends to leave widespread unused space when its interior dimensions substantially exceed the content footprint or its box depth substantially exceeds the item height.
A footprint mismatch leaves broad perimeter space, while excess depth leaves a vertical void above low contents; either condition can make the contents appear undersized within the available capacity.
For example, when a small group of contents occupies only a limited part of the available base and also sits well below the rim, unused space remains around and above the items rather than being confined to a few local gaps.
Increasing filler volume may require filling much of that excess capacity and can become inefficient without changing the underlying size relationship.
The defining issue in this scenario is therefore a structural mismatch between the oversized box and the footprint and height of its contents.
The Contents Sit Too Low or Leave Uneven Gaps
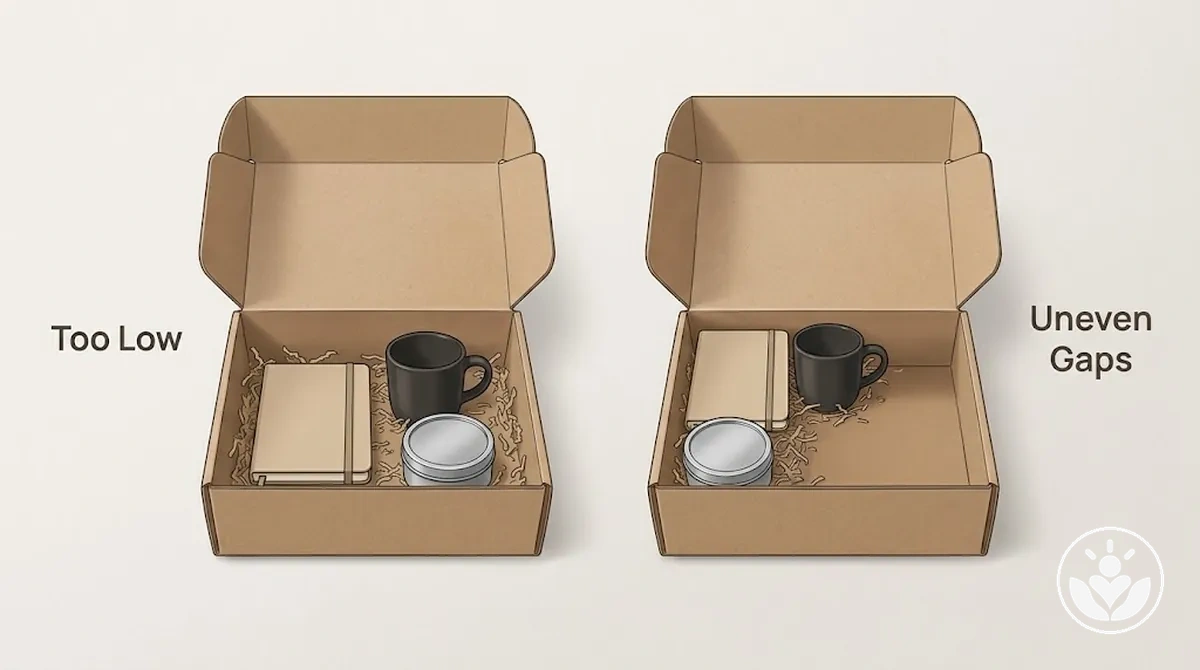
A correctly sized gift box can still look sparse when item height is low relative to the available depth or when clustering creates uneven gaps across the base.
Low contents can expose more of the box walls, while uneven spacing can shift the visual weight toward one area and leave one-sided empty space elsewhere.
Key distinctionVertical height problem vs horizontal spacing problem
Low item height
Pattern
Low-profile items sit well below the intended visual level, leaving more of the surrounding box walls visible.
Correction
Raise or support the contents gradually from the base.
Verify
Recheck item stability and lid clearance after each adjustment.
Uneven spacing
Pattern
Item height is workable, but clustering concentrates the contents in one area and leaves an unbalanced local gap elsewhere.
Correction
Reposition clustered items to redistribute the visual weight and gap pattern.
Verify
Use filler only if a residual local gap still needs volume after repositioning.
Both conditions can create a similar sparse appearance, but one is primarily vertical and the other concerns horizontal distribution. Neither automatically means that more filler is required.
How to Fill Empty Space Without Overstuffing
Reduce unwanted empty space progressively: establish enough base support for the contents, reassess item placement, and add filler only to the remaining gaps.
This sequence keeps filler from masking a sizing or arrangement problem and allows each adjustment to be checked before more material is added.
The stop condition is reached when the contents remain visible and uncrowded and normal lid closure is possible without pressure from the contents or filler.
Stop adding filler if another addition would obscure items, create crowding or pressure, or interfere with lid closure.
Support the base. Add enough base support to raise low contents where needed, then reassess item height before adding filler elsewhere.
Reassess item placement. Reposition contents when their distribution leaves avoidable local voids, while keeping each item visible and uncrowded.
Fill the remaining gaps. Add targeted filler only where unwanted gaps remain after the base support and item placement have been adjusted.
Check the result. Reassess visibility, gap distribution, and crowding after the adjustment; add more filler only if unwanted space remains and the contents still have adequate room.
Check lid closure and stop. Confirm that the lid closes normally without pressing on the contents or filler, and stop when further filler would reduce visibility, create pressure, or interfere with closure.
The required filler volume depends on box depth, content size, and the distribution of the remaining gaps, so there is no single amount that applies to every gift box.
A deeper box, smaller contents, or more widely distributed voids can require a different level of support or targeted filler than a shallower or more closely fitted arrangement.
Build Up the Base Before Filling Visible Gaps
When low-profile items sit too far below the intended visual level, add base support beneath them before treating the remaining surface gaps.
Raising the base can increase item height and vertical position, reducing the vertical empty space that remains visible around the contents.
Add base support gradually and reassess the contents after each adjustment rather than building to a predetermined filler depth.
Compressible filler such as tissue paper, shredded paper, kraft paper, or crinkle paper can provide volume beneath the contents; gift box fillers and cushioning covers material types in more detail.
After each adjustment, reassess item height, stability, and lid clearance, and stop raising the base if the contents become unstable or interfere with normal closure.
Support: Add base support beneath low-profile items to raise their vertical position gradually.
Reassess: Check the resulting item height and add further support only if the contents still sit lower than intended and remain stable.
Verify: Confirm stability and lid clearance before moving on to the remaining visible gaps.
Add Filler Only Where the Arrangement Needs Volume
After the base height and item positions are acceptable, add targeted filler only to the remaining voids rather than filling the gift box uniformly.
Matching filler placement to the gap location and gap size can reduce visible empty space without unnecessarily burying or crowding the contents.
Filler compressibility affects how much volume an addition occupies once placed, so add it gradually and reassess after each adjustment.
Check item visibility and lid closure as the filler volume changes; the stop condition is reached when the local gap is sufficiently reduced without obscuring the contents, creating pressure, or interfering with normal closure.
Locate the gap. Identify the remaining void and assess its gap size before placing filler.
Add targeted filler. Place filler in that local gap gradually, allowing for its compressibility rather than distributing material across areas that do not need added volume.
Reassess the result. Check the treated gap, item visibility, and crowding before deciding whether another adjustment is needed.
Check closure and stop. Confirm normal lid closure and stop adding filler if further volume would obscure an item, create pressure, or interfere with closure.
Targeted filler addresses residual visual gaps; controlling item movement is a separate troubleshooting task.
If the contents shift despite an acceptable visual arrangement, address how to stabilize gift box items rather than treating movement as another empty-space problem.
When Filler Will Not Solve the Empty-Space Problem
Filler is unlikely to solve the empty-space problem when widespread space or a disproportionate persistent void remains after reasonable base support and repositioning.
In that condition, the diagnosis should consider a structural mismatch or another positional correction rather than treating additional filler as the default corrective direction.
Persistence and gap distribution help distinguish problems that filler can refine from problems that require a different correction.
Check whether the contents can be redistributed, whether raising the base materially reduces the visible empty space, and whether the remaining void is widespread or limited to localised gaps.
Widespread space persists: If unused space remains broadly distributed around or above the contents after base support and repositioning, it suggests a likely box-to-content structural mismatch rather than a local filler shortfall.
Base support changes little: If raising low contents does not materially reduce the dominant empty area, further base filler is unlikely to address the main source of the persistent void.
Repositioning leaves the same broad void: If the contents can be redistributed but widespread space still dominates the box, continued filler demand supports a different corrective direction rather than uniform filling.
Only localised gaps remain: If the overall box fit is workable and repositioning or base support leaves only local empty space, targeted filler can still be appropriate for those remaining voids.
For example, a structurally oversized box can retain broad perimeter or vertical space even after the contents are raised and redistributed, so adding enough filler to occupy that capacity may be disproportionate to the problem.
A workable box with only localised gaps presents a different condition: selective filler can refine those remaining areas without treating the entire box as empty.
Use a Better-Fitting Box When Excess Space Is Structural
A better-fitting box becomes the more appropriate corrective direction when widespread space remains disproportionate after reasonable base support and repositioning.
The recommendation is conditional on the actual contents: a broad, persistent structural mismatch matters more than a few localised gaps.
Compare the box footprint with the combined content footprint, and compare box depth with item height.
When those relationships leave substantial excess capacity across the base or above the contents, filler demand can increase while the presentation may still look sparse.
If that broad mismatch persists after support and repositioning, check the box size rather than continuing to add filler as the main correction.
A closer fit may reduce the amount of unused capacity that has to be managed without implying a universal clearance or sizing ratio.
Rearrange the Contents When Empty Space Is Localised
When the box itself is otherwise workable, localised empty space is often better corrected by redistributing or raising the existing contents before adding substantial filler.
Repositioning changes where the gaps appear without changing the box capacity, so the corrective action should focus on the local pattern rather than treating the entire box as underfilled.
Start with the focal item and assess whether its position leaves one dominant gap, then adjust the spacing of supporting items to redistribute that empty area.
Where a height difference leaves one item sitting noticeably lower, raising or supporting that item can change the gap distribution without adding volume across the whole arrangement.
For example, a clustered arrangement may leave one large localised gap, while redistributing the same items can leave smaller remaining gaps that are easier to manage.
If repositioning improves the pattern but deeper arrangement changes are still needed, improve the item arrangement before adding more filler.
Common Mistakes When Filling Gift Box Gaps
Gap-filling mistakes usually come from diagnosing the wrong empty-space problem or continuing a correction beyond its useful stop point.
The consequence can be an ineffective correction or a new presentation problem, such as crowding, buried items, or unresolved widespread space.
Each mistake below follows the same pattern: consequence, recognition cue, and correction.
This separates diagnosis errors from execution errors so the corrective direction addresses the actual empty-space problem.
Adding filler before identifying the cause: This mistake can conceal whether the original problem is box fit, item position, or insufficient filler. A recognition cue is that substantial empty space remains after filler is added; the correction is to reassess the cause before adding more material.
Using excessive filler to compensate for an oversized box: A structural mismatch can create high filler demand while widespread space or a sparse appearance persists. Recognise the problem when filler is being added broadly rather than to localised gaps; the corrective direction is to address the box-to-content fit instead of continuing to build volume.
Filling every visible gap: Treating all visible gaps as defects can create crowding and remove useful breathing room around the contents. If filler begins to dominate the arrangement or compress the available space, the correction is to stop filling indiscriminately and address only gaps that make the presentation look unintentionally sparse.
Burying small items with filler: Adding filler around or over low-profile contents can reduce their visibility and create buried items. The recognition cue is that an item becomes difficult to see or identify; correct the problem by reducing or repositioning filler so the item remains visible.
Using decorative filler to solve a movement problem: Decorative filler may change the appearance of visible gaps without adequately addressing contents that still shift within the box. If the arrangement looks filled but items continue to move, recognise stabilisation as a separate issue and correct the movement problem rather than continuing to add decorative filler.